Do you ever find yourself wishing for that perfect, juicy chicken—whether it’s roasted, grilled, or fried? We’ve all been there, craving a flavorful, tender piece of chicken that doesn’t dry out. Well, the secret to achieving that dream dish lies in one simple technique: brining.
Brining might sound fancy, but it’s actually a straightforward process that makes a world of difference in how your chicken turns out. By soaking your chicken in a flavorful saltwater solution, you’re not only locking in moisture but also infusing it with rich seasonings that take your dish from good to unforgettable. Whether you’re cooking for a weeknight dinner or a special occasion, brining is the key to elevating your chicken game.
Ready to take your cooking to the next level? Let’s dive into this easy, foolproof chicken brine recipe that will leave you with tender, juicy, and perfectly seasoned chicken every time. Trust me—your taste buds will thank you!
Table of Contents
What You Need for a Perfect Chicken Brine Recipe
Brining chicken may sound like an extra step, but trust me, it’s one that will take your dish from good to incredible. Whether you’re roasting, grilling, or frying, brining ensures your chicken is juicy, tender, and full of flavor. Here’s everything you need to make a simple, yet effective chicken brine.
Basic Brine Ingredients
To start, you’ll need just a few key ingredients to create the brine solution:
- Kosher Salt (½ cup): This is the star of the brine, helping the chicken absorb moisture and season evenly. Make sure to use kosher salt for the best results, as it’s less salty by volume than regular table salt.
- Sugar (or Brown Sugar, ½ cup): The sugar balances the salt and helps caramelize the chicken, giving it a lovely golden color when cooked.
- Water (4 cups): Water is the base of the brine. It helps dissolve the salt and sugar, and it’s the medium that allows the chicken to soak up all the goodness.
These three simple ingredients will give you a basic brine that works wonders for all types of chicken.
Optional Flavor Boosters
Now that you’ve got the foundation down, let’s talk about how you can elevate your brine with a few optional additions. These are the ingredients that will make your chicken brine truly shine and infuse delicious flavors into the meat:
- Herbs (like Rosemary, Thyme, or Bay Leaves): Fresh herbs bring a fragrant, earthy note to the brine. Feel free to get creative with your combinations depending on the flavor profile you prefer.
- Garlic (2-3 cloves, smashed): Garlic is an aromatic powerhouse, adding savory depth to your chicken.
- Citrus (Lemon or Orange Zest): A bit of citrus zest (and even a squeeze of juice) will brighten the brine and add a fresh zing to your chicken.
- Peppercorns (1 tablespoon): Whole peppercorns give a subtle heat and spice, adding complexity to the flavor.
- Jalapeños or Red Pepper Flakes: If you love a little heat, toss in a few jalapeño slices or a pinch of red pepper flakes to spice things up.
- Honey or Brown Sugar: For a sweeter twist, swap out regular sugar with honey or brown sugar. This will balance out the saltiness and add richness.
A Few Helpful Tips
- Adjust Brine Quantities for Larger Batches: If you’re brining a whole chicken or several pieces, simply increase the brine quantities accordingly. You want to make sure the chicken is fully submerged in the solution.
- Customize to Your Taste: Don’t hesitate to experiment! Add different spices, herbs, or even a splash of soy sauce or vinegar for an extra kick. The beauty of brining is that it’s easy to adapt based on your preferences.
- Avoid Over-Salting: While salt is key to the brining process, remember that you don’t need to go overboard. Stick to the recommended ratio of salt to water for balanced seasoning.
Now that you know what you need, you’re ready to start preparing your chicken brine! Trust me, once you try this method, you’ll wonder how you ever cooked chicken without it. Let’s move on to the next step—making the brine!
Step-by-Step Instructions: 3 Simple Steps to Brine Chicken
Brining your chicken doesn’t have to be complicated—just follow these three easy steps, and you’ll be on your way to creating juicy, flavorful chicken in no time. Let’s break it down.
Step 1: Prepare the Brine Solution
First, it’s time to create your brine. This is where the magic happens! Here’s how to do it:
- In a large pot, combine ½ cup of kosher salt, ½ cup of sugar, and 4 cups of water.
- Stir the mixture over medium heat until the salt and sugar have completely dissolved into the water. It doesn’t take long, just a few minutes.
- Optional: Now is the time to add any herbs, garlic, citrus zest, or spices (think thyme, rosemary, or black peppercorns) that you want to infuse into the brine. These additions will bring incredible flavor to your chicken!
Step 2: Cool the Brine
Once your brine is fully mixed and dissolved, it’s time to cool it down. This is an important step because you don’t want to submerge your chicken in hot brine—it could begin cooking the meat prematurely. Here’s what to do:
- Remove the pot from the heat and let the brine cool to room temperature. If you’re in a rush, add a handful of ice cubes or more cold water to speed up the cooling process.
- Make sure the brine is completely cool before moving on. Your chicken will thank you for this.
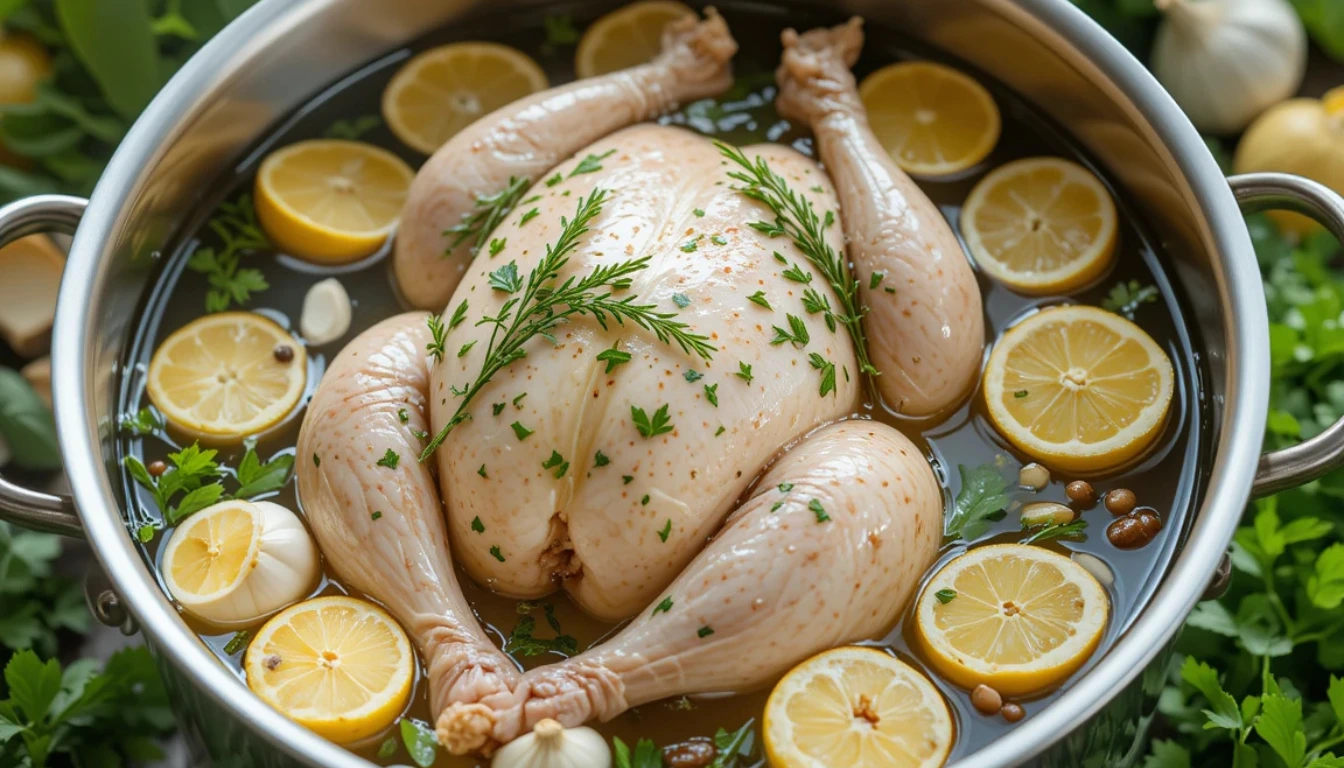
Step 3: Brine the Chicken
The final step is where all the magic happens—getting that chicken perfectly brined and ready to cook!
- Submerge your chicken in the cooled brine solution. You want to make sure the chicken is completely covered by the liquid. If you’re brining a whole chicken, use a large pot or bowl to ensure it fits properly.
- Brine Time:
- For whole chickens, brine for 4 to 12 hours in the refrigerator.
- For chicken pieces, 1 to 3 hours is usually enough. The longer the brine, the more flavor and moisture the chicken will absorb. But remember, don’t overdo it—too much brining can result in an overly salty chicken.
- After the brining time is up, remove the chicken and rinse it thoroughly under cold water to remove any excess salt. Pat it dry with paper towels. This step is crucial for ensuring that you get that crispy skin if you’re roasting or frying.
Pro Tip:
If you’re working with smaller cuts like breasts or thighs, you can also brine overnight if you want even deeper flavor. Just make sure to monitor the time to avoid over-brining.
Now that your chicken is perfectly brined, it’s ready for the next step—whether you’re roasting, grilling, or frying. That perfect moisture and flavor will shine through in every bite. Ready to cook? Let’s move on to the next phase!
Flavor Variations to Try
Once you’ve mastered the basic brine recipe, the real fun begins! Brining is a fantastic way to get creative and experiment with different flavors. You can easily customize your brine to complement the specific dish you’re preparing or to match your taste preferences. Here are some flavorful twists to make your brined chicken even more exciting:
1. Herbed Brine
Add fresh herbs to infuse your chicken with aromatic flavors. Herbs like rosemary, thyme, and sage are great options. You can either add them whole or roughly chop them for a more intense flavor. The oils from the herbs will infuse the chicken with fragrant, earthy notes that will make every bite memorable.
- How to add: Toss in a few sprigs of rosemary or thyme into your brine solution before heating it up.
2. Citrus Brine
For a fresh, zesty twist, citrus is your best friend. The acidity in citrus fruits like lemons, oranges, or even grapefruits brightens the brine and adds a refreshing kick that pairs wonderfully with chicken. It’s particularly ideal for lighter dishes or summer grilling.
- How to add: Add the zest of one lemon or orange into the brine, or squeeze in some juice. This will help bring out the tangy, refreshing flavors.
3. Spicy Brine
If you love a bit of heat, why not spice up your brine? Adding ingredients like jalapeños, crushed red pepper flakes, or a dash of hot sauce will infuse your chicken with just the right amount of spice. This is perfect if you’re grilling or frying your chicken and want a kick that cuts through the richness of the meat.
- How to add: Slice a jalapeño and add it directly into the brine, or sprinkle in some red pepper flakes if you want to keep it milder. Adjust the heat based on your spice tolerance!
4. Sweet Brine
Sweetening the brine can add a lovely depth of flavor that balances out the saltiness. Opt for brown sugar or honey instead of regular white sugar. These natural sweeteners will give the chicken a subtle caramelized glaze when it’s cooked, creating a perfect sweet-savory contrast.
- How to add: Swap in honey or brown sugar for the white sugar in the brine. You can also experiment with maple syrup for an extra hint of sweetness.
5. Smoky Brine
For those who love a smoky flavor, add a smoked paprika or a few drops of liquid smoke to the brine. This adds an extra layer of flavor that’s perfect for grilling or roasting. The result is a beautifully smoky, savory chicken that’s ideal for outdoor cooking.
- How to add: Stir in a teaspoon of smoked paprika or a few drops of liquid smoke into the brine before heating.
Bonus Tip: Mix and Match
Feel free to experiment by combining any of these flavors. For example, a citrus and herb brine is perfect for a light, fresh chicken dish, while a spicy and sweet brine gives you the best of both worlds—a little heat with a touch of sweetness.
The Key to Perfectly Brined Chicken
The beauty of brining is how it allows you to infuse your chicken with whatever flavors you desire, whether you’re going for something traditional, tangy, or spicy. Take your time to experiment with different combinations and find your favorite brine. The result will always be tender, juicy chicken packed with flavor. Happy brining!
Common Brining Mistakes to Avoid
Brining may be simple, but there are a few common mistakes that can mess with your results. To ensure you get the juiciest, most flavorful chicken every time, let’s cover what to avoid. These are small pitfalls that can make a big difference!
1. Skipping the Rinse
After brining, always rinse your chicken under cold water. This is crucial for removing any excess salt that could make your chicken too salty. Brining helps season the meat, but if you don’t rinse it properly, you might end up with overly salty chicken that’s tough to enjoy.
- Why it matters: Rinsing helps balance the saltiness and ensures a clean flavor.
2. Using Plain Water
Water alone won’t cut it when it comes to brining. While it’s the base of your brine, you need to add additional ingredients like herbs, spices, and sweeteners to create a flavorful brine. Without these, your chicken may come out bland, lacking that rich, savory punch we’re all aiming for.
- Pro Tip: Experiment with different herbs, garlic, citrus, and spices to enhance the flavor profile of your brine. Your chicken will absorb these flavors, making each bite burst with taste.
3. Over-Brining Your Chicken
It’s tempting to leave your chicken in the brine for hours, but don’t over-brine! Too long in the brine can make your chicken too salty and result in a mushy texture. The brine works best when it’s absorbed within the recommended time frame.
- For whole chicken: 4 to 12 hours is ideal.
- For chicken pieces: 1 to 3 hours is perfect.
4. Forgetting to Adjust for Different Cuts
Not all cuts of chicken need the same amount of brining time. Chicken breasts cook faster and are more delicate than drumsticks or whole chickens, so they don’t need as much time in the brine. If you leave chicken breasts in too long, they can become too salty or soggy.
- Tip: Always adjust the brining time depending on the size and cut of your chicken. Smaller pieces need less time, while a whole chicken can handle a longer brining period.
5. Not Using the Right Container
The container you choose for brining is more important than you might think. Avoid metal containers, as they can react with the salt and affect the flavor of your brine. Stick to plastic, glass, or even ceramic containers, which won’t react with the brine ingredients.
- Why it matters: Metal can cause a metallic taste and spoil the brining process. A non-reactive container ensures the brine stays true to its intended flavor.
6. Not Keeping the Chicken Submerged
Make sure your chicken is completely submerged in the brine for even flavor distribution. If it’s floating above the liquid, some parts of the chicken may not get properly brined, leading to uneven seasoning.
- Pro Tip: If the chicken isn’t fully submerged, weigh it down with a plate or use a large enough container to hold the chicken and brine.
Quick Recap
By avoiding these simple mistakes, you’ll ensure that every brined chicken you make is perfectly seasoned and juicy. Here’s a quick checklist for success:
- Rinse the chicken to remove excess salt.
- Flavor your brine with herbs, spices, and citrus for a rich taste.
- Don’t over-brine—stick to the recommended time.
- Adjust brine time based on the cut of chicken.
- Use non-reactive containers like glass or plastic.
- Ensure the chicken is fully submerged in the brine.
Why Brining Works: The Benefits
Brining is one of those secret kitchen techniques that takes your chicken (or any poultry, really) from good to absolutely irresistible. While it might seem like a simple step, brining has a whole science behind it that can transform the texture, flavor, and juiciness of your meat. Let’s dive into why brining works so well and the many benefits it brings to your cooking.
1. Moisture Retention
One of the most powerful reasons to brine your chicken is moisture retention. During the brining process, the salt in the solution draws water into the chicken’s muscle fibers. This process is called osmosis, and it helps the chicken retain more moisture while cooking. So, when you cook the chicken, it’s less likely to dry out. This means that every bite is juicy and tender, making your dish far more enjoyable.
- Benefit: Juicy chicken every time, no matter how you cook it.
2. Flavor Enhancement
Brining isn’t just about moisture—it’s also about infusing flavor. As the chicken absorbs the brine, it also takes on the flavors from the spices, herbs, and other ingredients you add to the brine. The salt helps open up the meat’s pores, allowing these flavors to penetrate deeper, seasoning the chicken from the inside out.
- Benefit: Evenly seasoned chicken with a flavor that goes beyond just the surface.
3. Improved Texture
Another benefit of brining is that it helps break down some of the proteins in the chicken. The salt in the brine dissolves muscle proteins like myosin, which can make meat tough. By breaking down these proteins, brining helps tenderize the chicken, resulting in a more succulent and tender bite.
- Benefit: Tender, melt-in-your-mouth chicken that’s not chewy or tough.
4. Better Crispy Skin
If you’re planning on roasting or frying your chicken, brining also plays a role in achieving crispy, golden skin. Brining draws moisture out of the skin, which makes it easier for the skin to crisp up when cooked. Plus, if you dry the chicken after brining, you’ll help it achieve that perfect crunch without the sogginess.
- Benefit: Crispy, golden skin that’s crunchy and satisfying.
5. Reduced Cooking Time
Since brined chicken retains more moisture, it doesn’t need to be cooked as long to reach the desired internal temperature. The extra moisture keeps the meat tender and juicy, even if it’s cooked for a shorter period of time.
- Benefit: Faster cooking without sacrificing tenderness or flavor.
6. Versatility
Brining isn’t just for chicken—it’s a technique that works on almost any type of meat, from turkey to pork chops. It’s a versatile technique you can experiment with to elevate the flavor and texture of a wide variety of proteins.
- Benefit: You can brine almost anything, allowing you to create juicy, flavorful dishes across the board.
More Delicious Chicken Recipes:
- Chicken Bryan Recipe You’ll Love Making
- San Antonio Grilled Mexican Chicken Marinade Recipe: 5 Easy Steps
- Blackstone Chicken Recipes: 6 Flavorful Meals You’ll Love
Conclusion
Brining is a simple yet transformative technique that can take your chicken (or any poultry) to the next level. By soaking your meat in a flavorful saltwater solution, you ensure it remains tender, juicy, and bursting with flavor. The science behind brining—moisture retention, flavor infusion, and protein breakdown—results in a chicken that is not only tastier but also easier to cook to perfection.
Whether you choose to roast, grill, or fry, brining guarantees that each bite will be deliciously satisfying. With just a little extra time and care, you’ll create chicken that is tender on the inside, crispy on the outside, and packed with flavor.
So, don’t hesitate to experiment with different brine variations and cooking methods to find your perfect recipe. Once you master the art of brining, you’ll enjoy juicier, tastier, and more flavorful chicken every time. Happy cooking, and enjoy the delicious results of your brined masterpiece!
FAQ: Chicken Brine Recipe
1. What is brining, and why should I brine my chicken?
Brining is the process of soaking chicken in a saltwater solution (often with spices and herbs) before cooking. This helps the chicken retain moisture, enhance its flavor, and improve its texture, ensuring a juicier, more flavorful dish.
2. How long should I brine my chicken?
For whole chickens, it’s best to brine them for 4 to 12 hours. For chicken pieces, 1 to 3 hours is usually sufficient. Brining too long can make the chicken too salty, so it’s important to follow the recommended times based on the size of the meat.
3. Can I brine my chicken overnight?
Yes, you can brine your chicken overnight, especially if it’s a whole chicken. Just be sure to keep it in the refrigerator to prevent bacteria growth. This longer brining time can deepen the flavor and improve texture, especially for larger cuts.
4. Can I add other ingredients to my chicken brine?
Absolutely! You can add a variety of spices, herbs, and even citrus fruits to your brine. Common additions include garlic, rosemary, thyme, bay leaves, peppercorns, and citrus zest. These ingredients infuse the chicken with extra flavor.
5. Do I need to rinse the chicken after brining?
Yes, it’s recommended to rinse the chicken after brining to remove excess salt. This helps prevent the chicken from being too salty. After rinsing, pat the chicken dry with paper towels before cooking, especially if you want crispy skin.
6. Can I reuse the brine?
It’s best to discard used brine, as it has absorbed raw chicken juices, which can cause foodborne illnesses. If you want to make a larger batch of brine for multiple chickens, simply prepare fresh brine each time.
7. Can I brine chicken without salt?
While salt is key to brining, you can experiment with a sugar-based solution or add other flavoring ingredients like fruit juices. However, salt plays a crucial role in both moisture retention and flavor enhancement, so skipping it might not provide the same results.
8. What’s the best way to cook brined chicken?
Brined chicken can be roasted, grilled, fried, or even smoked. The key is to cook it gently, as brined chicken retains moisture more effectively, making it more forgiving to higher heat without drying out.
9. How can I make my brined chicken crispy?
To achieve crispy skin, make sure to dry the chicken thoroughly after brining and before cooking. Whether you’re roasting or frying, dry skin helps it crisp up better. For even more crunch, try using a high-heat cooking method like roasting at a high temperature or pan-frying.
10. What type of salt should I use for brining?
Kosher salt is the most commonly used salt for brining because it dissolves easily in water and doesn’t make the brine too salty. Avoid table salt, as it is more concentrated and can make your brine too salty.
Have You Tried Our Recipe?
There are no reviews yet. Be the first one to write one.