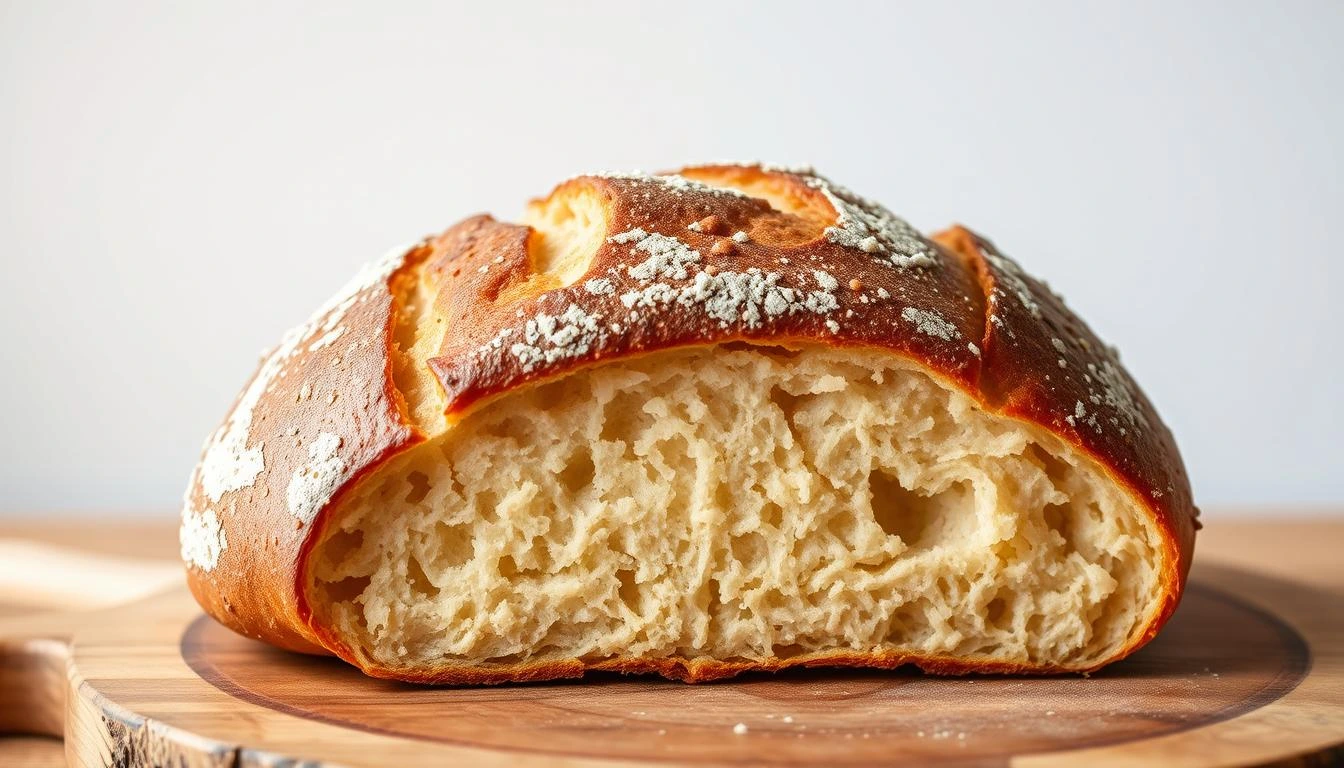
There’s something truly special about the aroma of freshly baked bread filling your kitchen, especially when it’s a rustic, crusty Italian bread made right at home. Have you ever wondered how to recreate that warm, golden, and delightfully chewy loaf you enjoy at your favorite Italian restaurant? Well, you’re in the right place! With just a handful of simple ingredients like flour, yeast, and olive oil, you can create a homemade Italian bread that’s perfect for any occasion. Whether you’re serving it alongside a comforting bowl of soup, enjoying it with your favorite spread, or using it for sandwiches, this bread is sure to impress. Let’s dive into the easy steps that will have your kitchen smelling like a traditional Italian bakery in no time!
Table of Contents
Key Benefits of Making Homemade Crusty Italian Bread Recipe
Baking your own crusty Italian bread at home comes with so many rewards—both in flavor and satisfaction. Here’s why you’ll love making this recipe from scratch:
- Freshness at its Best: There’s nothing like the taste of fresh bread hot out of the oven. When you make homemade Italian bread, you’re getting a loaf with a crispy, golden crust and a soft, airy interior—no preservatives or artificial additives involved.
- Customization: One of the best parts about making your own bread is the freedom to make it your own. Want to add a bit of rosemary or garlic for extra flavor? Feel free to experiment! The recipe serves as a blank canvas, allowing you to create a loaf that’s perfectly suited to your tastes.
- Cost-Effective: Sure, you could buy a loaf of bread at the store, but when you break down the cost of the ingredients for homemade bread, you’ll find it’s much more economical. And the best part? You’re not sacrificing quality for the price!
- Healthier Option: Making your own bread means you control every ingredient. You can opt for whole wheat flour or add extra grains for a boost of nutrition. Plus, there’s no need for preservatives—just wholesome ingredients like olive oil, water, and yeast.
- The Joy of Baking: The process of kneading dough, waiting for it to rise, and then watching it bake into a beautiful loaf is incredibly rewarding. Baking can be a mindful, relaxing activity that fills your home with wonderful smells and gives you a sense of accomplishment.
So, whether you’re an experienced baker or just getting started, this easy Italian bread recipe offers the perfect balance of simplicity and delicious results. Ready to enjoy the magic of homemade bread? Let’s get started!
Ingredients for Crusty Italian Bread
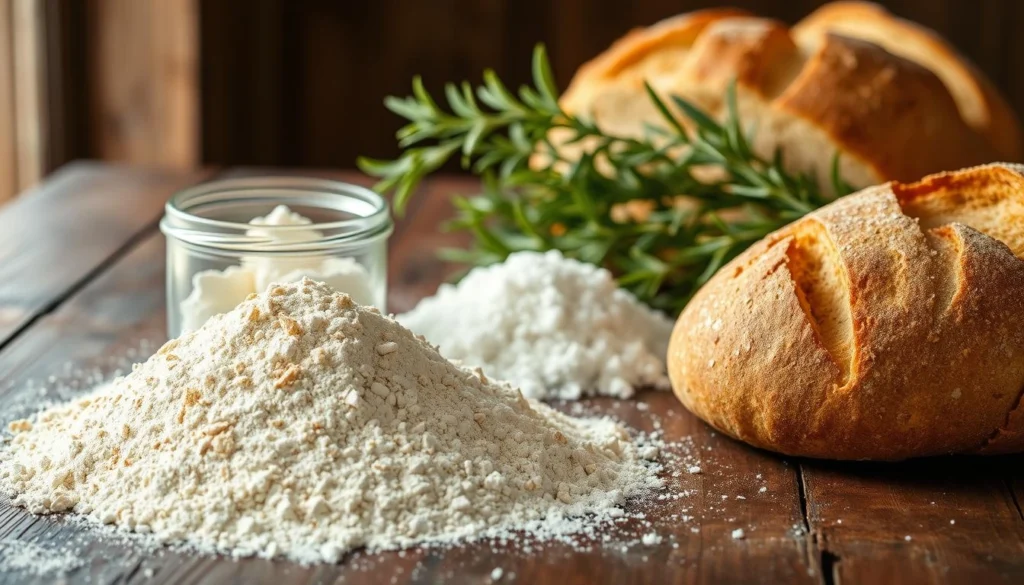
Before we dive into the process of making this delicious homemade Italian bread, let’s take a look at the ingredients you’ll need. Don’t worry; it’s a simple list of basic, easy-to-find ingredients that work together to create the perfect loaf.
- 3 1/2 cups all-purpose flour – The base of your bread, providing that light, airy texture we love in Italian bread. You can use bread flour for a slightly chewier texture, but all-purpose flour works beautifully.
- 1 1/2 teaspoons salt – Enhances the flavor and helps to control yeast activity.
- 1 teaspoon active dry yeast – This is the magic behind your dough’s rise. Make sure it’s fresh for the best results!
- 1 1/2 cups warm water – Warm water helps activate the yeast. It should be about 110°F (warm to the touch, but not too hot).
- 1 tablespoon olive oil – Adds richness to the dough and helps to create that lovely crisp crust.
Optional Add-ins:
- 1 tablespoon honey or sugar – If you prefer a touch of sweetness, this is an optional ingredient to give your bread a slightly sweet note.
- Herbs (rosemary, thyme, or garlic) – Add some Italian flair by mixing in finely chopped herbs for extra flavor.
Pro Tip:
If you want to add a rustic touch, you can sprinkle cornmeal or flour on your baking surface before placing the dough. This will give the loaf an authentic look and feel, plus a little extra crunch on the bottom!
With these ingredients, you’re all set to create a beautiful, crusty Italian bread that’s full of flavor and texture. Ready to start baking? Let’s move on to the next step!
Instructions for Making Crusty Italian Bread
Now that you have all your ingredients, it’s time to get your hands a little floury and dive into the fun part—baking your crusty Italian bread! Follow these simple steps, and you’ll have a homemade loaf that’s golden, chewy, and utterly satisfying.
1. Activate the Yeast
- In a small bowl, combine the warm water and yeast. Stir in a pinch of sugar or honey if you like a slightly sweeter flavor. Let it sit for about 5-10 minutes until it becomes frothy and bubbly. This tells you that your yeast is alive and ready to work its magic!
2. Mix the Dry Ingredients
- In a large mixing bowl, whisk together the flour and salt. Make a small well in the center to pour in your activated yeast mixture and olive oil.
3. Form the Dough
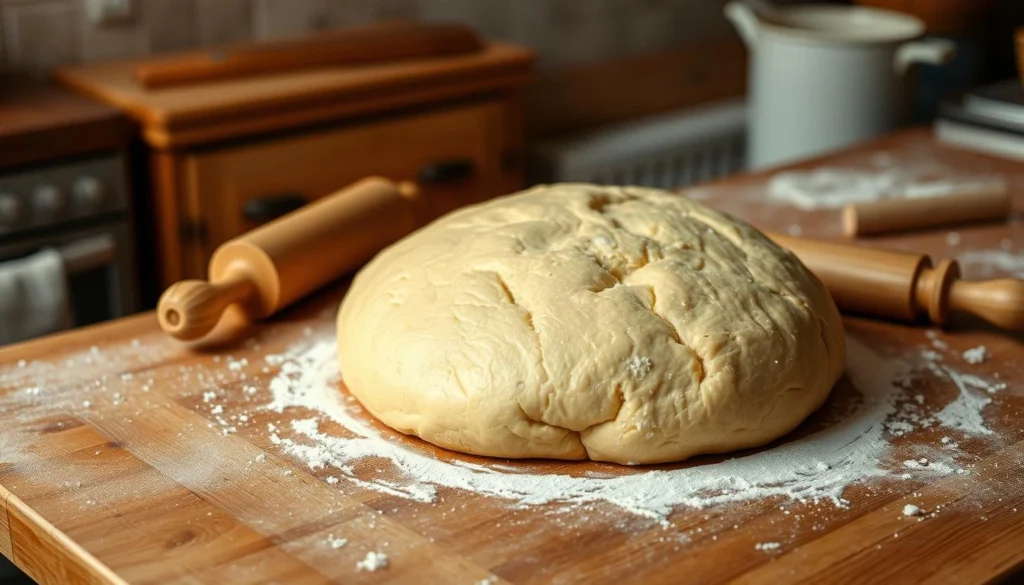
- Using a wooden spoon or your hands, start mixing the ingredients together until they form a rough dough. Don’t worry if it’s a little sticky at first—that’s normal!
4. Knead the Dough
- Transfer the dough onto a floured surface and begin kneading. Push the dough down with your palms, fold it over, and turn it a quarter turn. Repeat this for about 8-10 minutes, until the dough is smooth and elastic. If the dough feels too sticky, sprinkle it with a little more flour. If it’s too dry, add a splash of water.
Pro Tip: To test if your dough is ready, do the “poke test.” Gently press a finger into the dough—if it springs back, you’re good to go!
5. First Rise
- Place your kneaded dough into a lightly oiled bowl, cover it with a clean kitchen towel, and let it rise in a warm place for about 1-1.5 hours, or until it has doubled in size.
6. Shape the Dough
- Once the dough has risen, punch it down to release the air, then shape it into a round or oval loaf. For an extra touch of authenticity, you can shape it like a traditional Italian boule—a rustic round shape. Place it onto a parchment-lined baking sheet or a floured pizza peel.
7. Second Rise
- Cover the dough with a towel and let it rise for another 30 minutes, allowing the loaf to puff up just a little more.
8. Score the Loaf
- Preheat your oven to 450°F (232°C). Before baking, score the top of the dough with a sharp knife or razor blade, creating a few shallow slashes across the top. This helps the bread expand as it bakes, creating that perfect, crusty texture.
9. Bake the Bread
- Place the loaf into your preheated oven and bake for 25-30 minutes, or until the crust is a rich golden-brown and sounds hollow when tapped on the bottom. The internal temperature of the bread should reach around 200°F (93°C).
10. Cool and Serve
- Once your Italian bread is baked to perfection, remove it from the oven and let it cool on a wire rack for at least 20 minutes before slicing. This helps set the texture, making each slice beautifully tender.
Pro Tip:
For that extra-crispy crust, you can place a small oven-safe pan of water at the bottom of the oven while baking. The steam will help create that iconic crackly crust we all love!
Your homemade crusty Italian bread is now ready to enjoy. Savor the fruits of your labor, and be prepared for the delicious smell to fill your home. It’s perfect for dipping in olive oil, pairing with pasta, or simply enjoying on its own with a bit of butter. Happy baking!
Pro Tips and Variations for Perfect Crusty Italian Bread
Making homemade Italian bread is already a rewarding experience, but with a few pro tips and fun variations, you can elevate it to new levels. Whether you’re aiming for a slightly different flavor profile or looking to perfect your baking technique, these tips will help you craft the best possible loaf.
Pro Tips for a Perfect Loaf
- Use Room Temperature Ingredients: For the best results, make sure your water and olive oil are at room temperature before mixing. This helps everything blend more smoothly and ensures that your yeast activates properly.
- Knead Until Smooth: If you’re new to bread-making, kneading may feel like a workout, but it’s essential for developing the dough’s texture. Don’t rush this step—it should take about 8-10 minutes, and the dough should feel smooth and elastic. Remember, if the dough feels sticky, just sprinkle in a bit more flour.
- Warm Environment for Rising: Yeast loves warmth, so try to place your dough in a warm, draft-free spot while it rises. If your kitchen is a bit cold, try preheating your oven to the lowest setting for a few minutes, turning it off, and then placing the dough inside to rise.
- Don’t Skip the Scoring: Scoring your dough (making shallow cuts on top) isn’t just for looks—it helps the bread expand properly while baking, creating that beautiful rustic finish. Plus, it adds to the texture!
Fun Variations to Try
- Garlic and Herb Bread: Add flavor by mixing in garlic powder, rosemary, or thyme to the dough. These herbs will infuse the bread with savory goodness, making it perfect for pairing with pasta or as an appetizer.
- Olives or Sun-Dried Tomatoes: For a Mediterranean twist, incorporate chopped olives or sun-dried tomatoes into the dough. They’ll bring a tangy richness that pairs beautifully with the bread’s crunchy exterior and soft interior.
- Whole Wheat or Multigrain Option: For a heartier loaf, replace part of the all-purpose flour with whole wheat flour or a multigrain blend. Just be sure to adjust the water slightly, as whole wheat flour tends to absorb more liquid.
- Add Seeds for Extra Crunch: Before baking, sprinkle the top of your dough with sesame seeds, poppy seeds, or flax seeds for an added crunch and a nutty flavor. These also make your bread look extra appealing!
How to Store and Keep Your Bread Fresh
- Cool Before Storing: After baking, let your bread cool completely on a wire rack to prevent it from becoming soggy. If you store it while it’s still warm, the condensation can affect the crust and texture.
- Keep It in a Paper Bag: For the best texture, store your crusty Italian bread in a paper bag at room temperature for up to 2-3 days. This helps preserve the crust’s crispness while keeping the inside soft.
- Freezing: If you’re making extra bread, you can freeze slices to enjoy later. Just slice the loaf and wrap it tightly in plastic wrap or aluminum foil before placing it in a freezer bag. When you’re ready to enjoy, simply toast or reheat in the oven!
With these pro tips and variations, you’ll be well on your way to becoming a bread-baking pro. Feel free to experiment and make this recipe your own—it’s a versatile, fun project that anyone can master!
Serving Suggestions for Crusty Italian Bread
Now that your crusty Italian bread is ready and cooled, it’s time to get creative with how you serve it. This bread is incredibly versatile and can be enjoyed in so many different ways, whether you’re pairing it with a meal or savoring it on its own. Here are some ideas to inspire your next serving!
1. Serve with Olive Oil and Balsamic Vinegar
One of the simplest and most delicious ways to enjoy your Italian bread is to dip it in extra virgin olive oil and balsamic vinegar. This is a classic Italian starter that’s full of flavor, and the crusty exterior of your bread is perfect for soaking up the oils.
2. Pair with Soups and Stews
The hearty texture of crusty Italian bread makes it an excellent accompaniment to soups and stews. Try serving it with a bowl of minestrone soup, tomato basil soup, or a rich beef stew. Use the bread to soak up all the flavorful broth—it’s a perfect match!
3. Make Sandwiches
Use your homemade Italian bread as the base for a delicious sandwich. The thick, chewy slices hold up well to all sorts of fillings. You could make a simple caprese sandwich with fresh mozzarella, tomatoes, and basil or go for a classic Italian sub with salami, ham, and provolone cheese. The options are endless!
4. Garlic Bread or Bruschetta
Want to take things up a notch? Turn your Italian bread into garlic bread by spreading softened butter mixed with minced garlic on the slices, then toasting them until golden. Alternatively, make bruschetta by topping slices of bread with a fresh mixture of diced tomatoes, garlic, basil, and a drizzle of olive oil. These make perfect appetizers or party snacks.
5. Serve with Cheese and Charcuterie
Your crusty bread is a fantastic addition to a cheese board or charcuterie platter. Pair it with a variety of cheeses, such as parmesan, pecorino, or burrata, and add some slices of prosciutto or salami. The bread’s crunchy texture complements the creamy cheeses and savory meats beautifully.
6. Enjoy for Breakfast
Not just for lunch or dinner, your Italian bread can also make a delightful breakfast. Toast slices and spread them with butter, jam, or even honey for a quick and satisfying start to your day. You could also top it with a poached or scrambled egg for a more filling option.
Pro Tip:
For a more rustic touch, warm up your Italian bread in the oven before serving. Simply wrap the loaf in aluminum foil and bake it at 350°F (175°C) for about 10 minutes. This will bring back that fresh-baked aroma and crispy crust.
With these serving ideas, you’ll never run out of ways to enjoy your crusty Italian bread. Whether you’re using it for dipping, sandwich-making, or simply enjoying it with a good meal, it’s sure to become a staple in your kitchen!
More Delicious Bread Recipes:
- Vegan Bread Recipe: The Ultimate Comfort Food You’ll Love
- The Ultimate Guide to the Best French Bread Recipe
- Cuisinart Bread Maker Recipes You’ll Absolutely Love
Conclusion: The Joy of Homemade Crusty Italian Bread
There’s something incredibly satisfying about pulling a fresh, crusty Italian bread out of the oven and knowing you made it yourself. The aroma, the golden-brown crust, and that soft, chewy interior are all signs of your success. Whether you’ve made it as an addition to a meal, as a delicious snack, or to share with family and friends, this bread brings a touch of homemade warmth to any occasion.
With simple ingredients and a few easy-to-follow steps, making homemade bread has never been more rewarding. You don’t need to be a professional baker to create a loaf that rivals what you’d find in a traditional Italian bakery—just a little time, patience, and care.
Happy baking, and enjoy every bite of your delicious, homemade bread!
FAQs:
1. Can I use instant yeast instead of active dry yeast?
Absolutely! Instant yeast can be used in place of active dry yeast. The great thing about instant yeast is that it doesn’t need to be dissolved in water first, so you can mix it directly with the dry ingredients. Just use the same amount and proceed with the recipe as usual.
2. How do I know when the bread has fully risen?
The dough is ready for baking when it has doubled in size. To test this, gently press two fingers into the dough. If the indentations remain and don’t spring back, the dough has risen enough. If the indentations bounce back, give it a little more time to rise.
3. What’s the best way to store homemade Italian bread?
To keep your crusty bread fresh, store it in a paper bag at room temperature for up to 2-3 days. If you want to keep it for longer, slice the loaf and wrap the slices tightly in plastic wrap or aluminum foil, then freeze them. Just toast or reheat the slices when you’re ready to enjoy!
4. How can I make the crust extra crispy?
For an extra crispy crust, try placing a small pan of water at the bottom of the oven as you bake the bread. The steam will help create a beautiful, crackling crust. Another option is to bake the bread on a pizza stone, which can help achieve a crispier texture.
5. Can I make this bread with whole wheat flour?
Yes, you can substitute some or all of the all-purpose flour with whole wheat flour. Whole wheat flour will give the bread a denser texture, but it adds a lovely nutty flavor. If you use only whole wheat flour, you may need to adjust the amount of water, as whole wheat absorbs more liquid than white flour.
6. How do I know when the bread is done baking?
The bread is done when the crust is golden brown, and it sounds hollow when tapped on the bottom. If you have a kitchen thermometer, check the internal temperature—it should read around 200°F (93°C) when fully baked.
7. Can I add herbs or other mix-ins to the dough?
Yes, you can absolutely add herbs, garlic, cheese, or even olives to the dough. Just fold them in gently after the first rise, and be sure not to overwork the dough so it retains its light texture.
8. Why did my bread turn out too dense?
If your Italian bread turned out too dense, it could be due to over-kneading, not allowing the dough to rise long enough, or using too much flour. Be sure to knead the dough just until it’s smooth, let it rise fully, and use the correct amount of flour for the right texture.
Have You Tried Our Recipe?
There are no reviews yet. Be the first one to write one.