
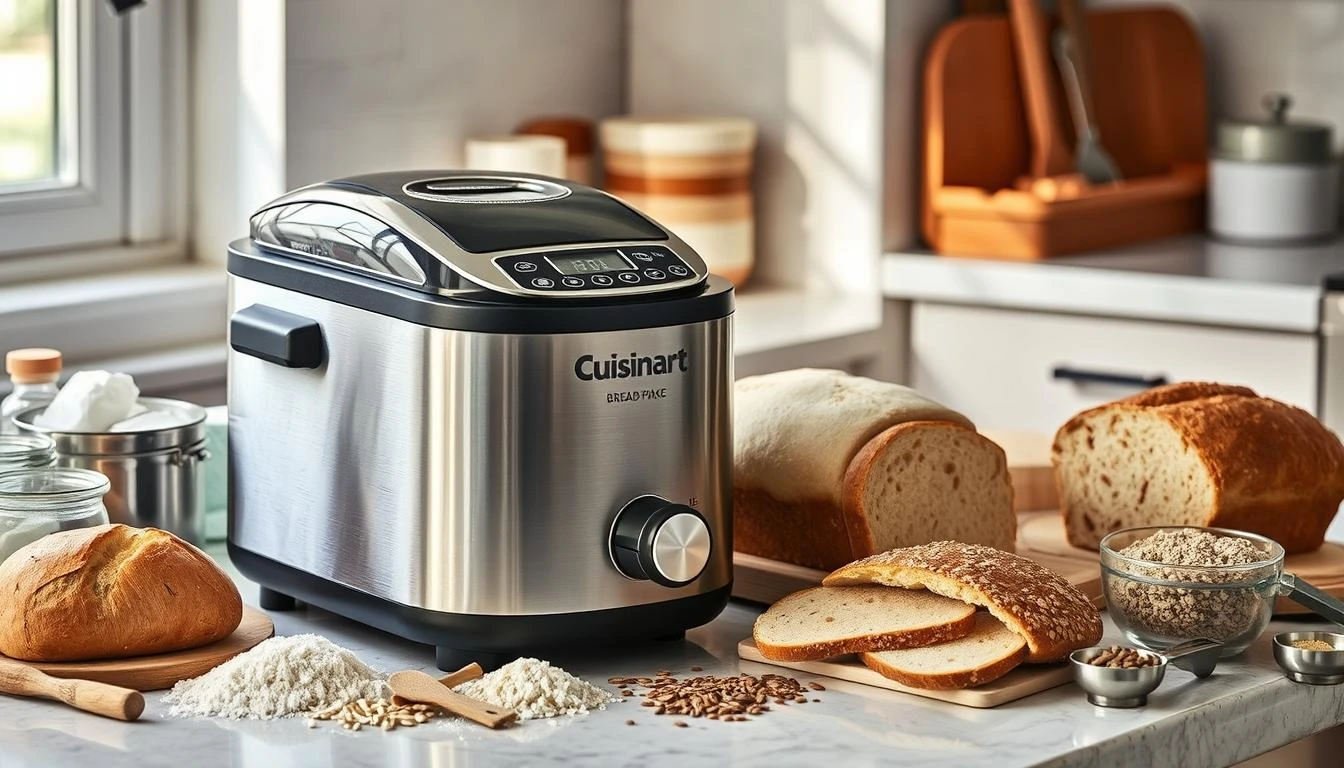
There’s something truly special about the aroma of fresh, homemade bread filling your kitchen. Whether you’re a seasoned baker or just starting out, using a Cuisinart bread maker makes the process easier than ever. Imagine biting into a warm, soft loaf with just the right texture, knowing it’s made with simple, wholesome ingredients you control. This recipe isn’t just about making bread—it’s about crafting a comforting experience, perfect for any occasion. From a delicious breakfast spread to a hearty side for dinner, this easy recipe offers endless possibilities for customization. Ready to bake a loaf that’ll leave everyone asking for seconds? Let’s get started!
Table of Contents
Key Benefits of Cuisinart Bread Maker Recipes
When it comes to making homemade bread, the benefits extend far beyond the delicious aroma filling your kitchen. With a Cuisinart bread maker, you get the perfect balance of convenience, customization, and flavor. Here’s why you’ll love this recipe:
- Freshness at Your Fingertips: There’s nothing like the taste of freshly baked bread. By using a bread maker, you can enjoy warm, soft loaves right when you want them, without the hassle of kneading or watching over the dough.
- Customizable to Your Liking: One of the best things about making bread with a Cuisinart bread maker is the ability to control every ingredient. Want to experiment with whole wheat flour, add some herbs for extra flavor, or make it gluten-free? The choice is yours!
- Time-Saving and Easy: The bread maker takes care of the mixing, kneading, and even baking. You just add the ingredients, set the machine, and let it work its magic. It’s the ultimate solution for busy days when you still want to enjoy homemade goodness.
- Healthier Option: Homemade bread lets you skip the preservatives and artificial additives often found in store-bought varieties. You can choose high-quality, nutritious ingredients, knowing exactly what’s going into each loaf.
- Cost-Effective: Making bread at home can save you money in the long run, especially when you consider how much store-bought loaves can cost. Plus, you’ll be amazed at how far your ingredients go when you make multiple batches.
By using your Cuisinart bread maker, you’re not just baking bread—you’re creating a versatile, healthier option that fits your taste and lifestyle. Ready to start? The next step is gathering the ingredients!
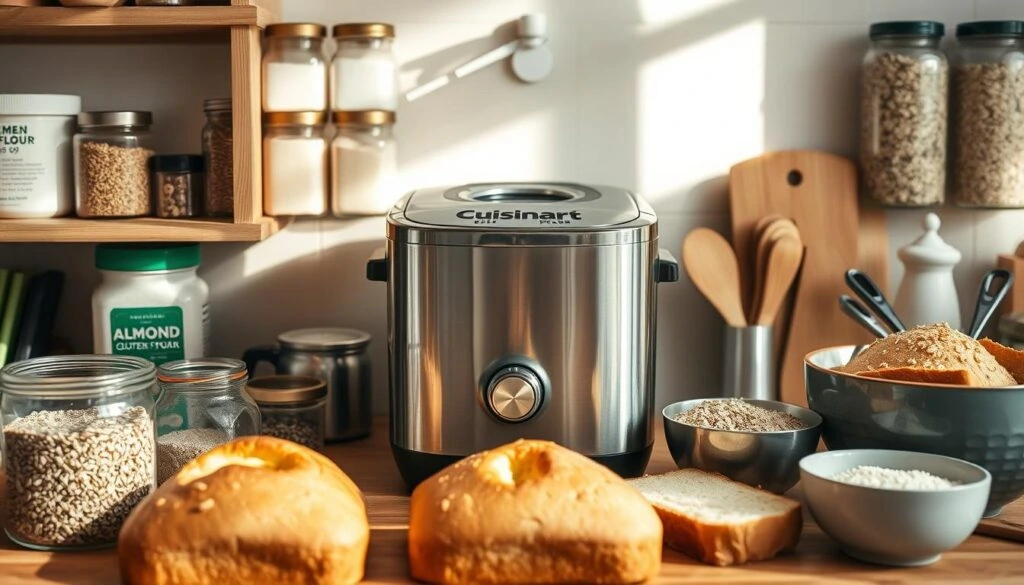
Essential Ingredients for Perfect Homemade Bread
Let’s start with the foundation of your homemade bread—gathering the ingredients. This recipe uses simple, pantry-friendly staples, so you’re likely to have most of them already on hand. Whether you’re new to bread making or a seasoned pro, this easy list will help you bake a perfect loaf every time.
Essential Ingredients:
- 2 ½ cups bread flour: The main ingredient for your loaf. Bread flour has a higher protein content, which helps create that soft, chewy texture we all love. If you’re feeling adventurous, try mixing in some whole wheat flour for a heartier loaf.
- 2 tablespoons sugar: A little sweetness goes a long way in activating the yeast. This amount helps the dough rise beautifully and enhances the flavor without making the bread overly sweet.
- 1 teaspoon salt: Salt is crucial not only for taste but also to regulate the yeast’s activity. It helps balance the bread’s flavor, so don’t skip it!
- 2 teaspoons active dry yeast: This is the magic ingredient that makes your dough rise. Make sure your yeast is fresh for the best results. If you’re unsure, you can test it by dissolving it in warm water to see if it bubbles.
- 1 cup warm water (110°F/45°C): The water should be warm to the touch but not hot—too much heat can kill the yeast. This warmth helps activate the yeast and jump-start the rising process.
Optional Add-ins for Extra Flavor:
- 2 tablespoons olive oil: Adding olive oil to your dough helps create a softer, slightly richer texture. It also gives your bread a wonderful subtle flavor.
- 1 tablespoon honey: Honey isn’t just for sweetening your bread—it also helps retain moisture, giving you a soft loaf that stays fresh longer.
- 1 tablespoon dried herbs (rosemary, thyme, or oregano): If you want a savory twist, try adding herbs like rosemary or thyme. These give the bread a fragrant aroma and extra flavor, perfect for pairing with soups or cheeses.
Substitution Tips:
- Gluten-Free Flour: If you’re making this bread for someone with gluten sensitivities, you can use a gluten-free flour blend instead of regular bread flour. Make sure the blend includes xanthan gum for the best texture.
- Dairy-Free Option: If you prefer a dairy-free loaf, simply swap out any butter for olive oil or omit it entirely.
Ingredient Quality Matters:
For the best results, always opt for high-quality ingredients. Fresh yeast and premium bread flour make a big difference in the texture and flavor of your loaf. If you have access to organic options, they can elevate the taste and nutrition of your bread.
With your ingredients ready, you’re one step closer to enjoying a warm, homemade loaf. Next, let’s dive into the fun part—preparing the dough!
Step-by-Step Instructions for Perfect Homemade Bread
Now that you’ve gathered your ingredients, it’s time to turn them into a delicious loaf of bread! Using your Cuisinart bread maker is the easiest part, as it takes care of most of the work. Let’s walk through the simple steps together to make sure you get a perfect loaf every time.
Step-by-Step Instructions:
- Add Ingredients to the Bread Maker: Start by adding your ingredients in the right order. This is crucial for the bread maker to work its magic. Here’s the order:
- Pour in warm water first (this helps activate the yeast).
- Next, add sugar and salt.
- Follow up with the bread flour, spreading it evenly over the water.
- Sprinkle the active dry yeast on top of the flour, making sure it’s not in direct contact with the liquid.
- Set the Bread Maker: Choose your settings based on your desired loaf type. Most Cuisinart bread makers have options for basic white bread, whole wheat, and sweet bread. For this recipe, we’re making a simple white bread loaf, so select the basic setting.
- Set the crust color (light, medium, or dark) based on your preference.
- Press start, and let the machine do the rest!
- Let the Bread Maker Do the Work: The bread maker will knead, rise, and bake the dough automatically. It typically takes around 3 to 4 hours, depending on the settings you’ve chosen. During this time, the machine will mix the ingredients, knead the dough, and let it rise—no need to intervene.
- Check the Dough Consistency: About halfway through the kneading process, take a quick peek at the dough. It should form a smooth, slightly sticky ball. If it seems too dry, add a little more water (a tablespoon at a time). If it’s too wet, sprinkle in a little more flour. This step is just to make sure the dough has the perfect consistency.
- Let the Bread Bake: Once the kneading is complete, the bread maker will start baking your loaf. Keep in mind that every bread maker has its own baking time, but you’ll know it’s done when the top of the loaf is golden brown, and your kitchen is filled with the irresistible smell of fresh bread.
- Cool Before Slicing: Once the baking cycle is complete, remove the bread from the pan carefully. Let it cool on a wire rack for about 10-15 minutes before slicing. While it’s tempting to cut into it right away, letting it cool ensures a better texture and flavor.
Pro Tips for Perfect Bread Every Time:
- Measure Ingredients Carefully: The secret to perfect bread is all in the measurements. Too much flour can result in a dense loaf, while too little can lead to a loaf that doesn’t rise properly. Use a kitchen scale for accuracy, especially when measuring flour.
- Check Yeast Freshness: Always make sure your yeast is fresh for the best rise. If you’re unsure, you can test it by dissolving it in warm water with a pinch of sugar. If it bubbles, it’s still good to go!
- Customizing Your Loaf: Want to switch things up? Feel free to experiment by adding seeds, nuts, or dried fruit to the dough once it’s mixed. Just add them when the bread maker beeps to let you know it’s time for additional ingredients.
Troubleshooting Tip:
If your bread hasn’t risen as expected, it could be due to old yeast or incorrect water temperature. Make sure the water is warm, not hot, as it can kill the yeast. If your bread is too dense, try reducing the flour or adding a little extra water.
Once your loaf is cool and ready, it’s time to enjoy the fruits of your labor. Whether you’re serving it with a meal, spreading butter on a warm slice, or making a sandwich, there’s no better feeling than enjoying freshly baked bread straight from the bread maker.
You’ve got this! Let’s move on to the next section for some pro tips and fun variations!
Pro Tips and Creative Variations for Your Perfect Bread
Now that you’ve mastered the basic recipe, it’s time to elevate your bread-making game with some pro tips and fun variations. Whether you’re looking to tweak the flavor, change the texture, or try something completely new, these tips will help you make your homemade bread even more delicious and customized to your liking.
Pro Tips for Perfect Bread:
- Use Fresh Ingredients: Always use fresh yeast and high-quality flour for the best results. Yeast that’s too old can lead to a lack of rise, while stale flour may affect the flavor of your loaf. Fresh ingredients ensure your bread has the perfect texture and taste.
- Water Temperature Matters: When adding the warm water, make sure it’s around 110°F (45°C)—just warm enough to activate the yeast but not hot enough to kill it. If you don’t have a thermometer, test the water by feeling it with your finger. It should be comfortably warm, like a cozy bath!
- Adjust for Altitude: If you live at a high altitude, you may need to adjust the amount of water or flour. In higher altitudes, dough tends to rise faster and may need slightly less liquid to prevent it from becoming too sticky.
- Don’t Skip the Resting Time: After the bread is baked, resist the urge to slice it immediately. Letting the bread cool on a wire rack for 10-15 minutes ensures the moisture redistributes evenly, resulting in a fluffier texture and better flavor.
Fun Variations to Try:
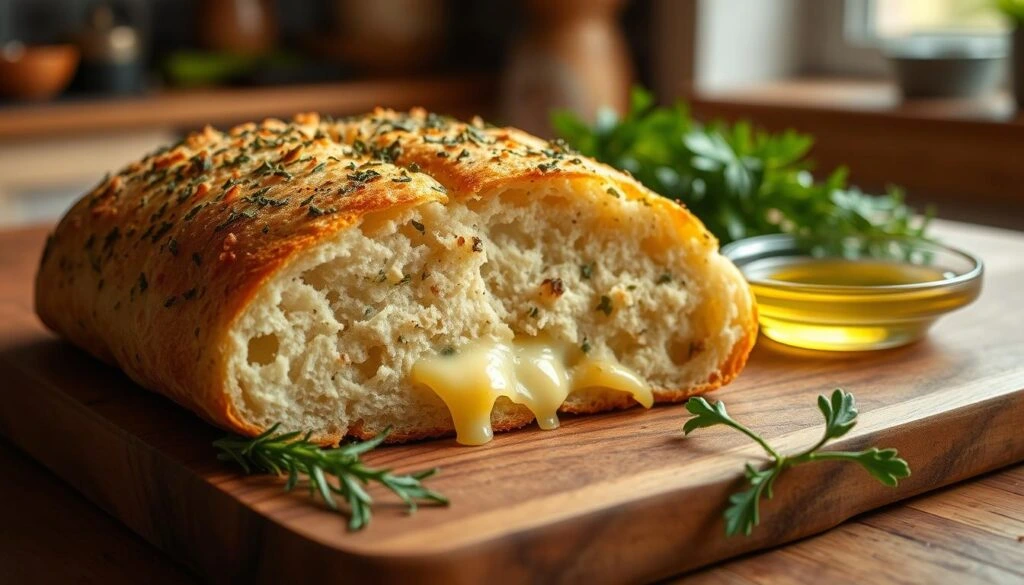
- Herb-Infused Bread: If you love savory flavors, try adding herbs like rosemary, thyme, or oregano to your dough. Simply mix in 1-2 tablespoons of dried herbs during the kneading process for a fragrant, aromatic bread that pairs perfectly with soups, stews, or cheese.
- Cheese and Garlic Bread: For a cheesy twist, fold in grated cheese (cheddar, mozzarella, or Parmesan) and a sprinkle of garlic powder after the initial kneading. The cheese will melt into the bread, creating pockets of gooey goodness.
- Whole Wheat Bread: Want a heartier, more nutritious loaf? Swap half or all of the bread flour with whole wheat flour. Just be aware that whole wheat flour absorbs more liquid, so you may need to add a little extra water to get the right dough consistency.
- Sweet Bread Variations: Craving something sweet? Add 1-2 tablespoons of honey or maple syrup to the dough, along with a dash of cinnamon or nutmeg. You can even toss in some dried fruit like raisins, cranberries, or chopped apples for a deliciously sweet loaf.
- Gluten-Free Option: To make a gluten-free loaf, simply substitute the bread flour with a high-quality gluten-free flour blend. Be sure to check that your flour mix includes xanthan gum or guar gum to help with structure and texture.
Troubleshooting Tips:
- Bread Won’t Rise? Double-check the expiration date on your yeast. If your bread hasn’t risen properly, it could be due to inactive yeast or too much salt (which can slow down the yeast). Make sure the ingredients are added in the right order—yeast should always be kept away from salt until it’s activated.
- Dense Loaf? If your bread is dense, it could be due to using too much flour or not kneading the dough enough. Adding a little extra water or adjusting the flour can help achieve a lighter, fluffier texture.
By following these pro tips and experimenting with different variations, you can tailor your bread to your specific tastes. The beauty of making bread at home is that you have the freedom to be creative with flavors, textures, and ingredients. Don’t be afraid to try new things—you’ll be amazed at the delicious possibilities!
Next, we’ll talk about how to serve your freshly baked loaf and offer some tasty pairing suggestions. Let’s keep the bread love going!
Delicious Serving Ideas for Your Homemade Bread
Now that your homemade bread is ready, it’s time to enjoy the fruits of your labor! Whether you’re serving it for breakfast, lunch, or dinner, this bread is versatile and pairs wonderfully with so many dishes. Let’s explore a few serving suggestions to help you make the most of your freshly baked loaf.
1. Classic Bread with Butter
Sometimes, the simplest way is the best. Slice your loaf and spread a generous layer of butter on top while the bread is still warm. The butter will melt into the soft crumb, creating a comforting, melt-in-your-mouth experience. If you like, try flavored butter by mixing in herbs, garlic, or honey for an extra special treat.
2. Sandwiches
This bread makes an excellent base for sandwiches. Whether you’re making a classic PB&J, a savory turkey and cheese sandwich, or something more gourmet like a smoked salmon bagel, this loaf holds up well to any filling. Slice it a little thicker for a hearty sandwich or thinner for a delicate bite.
3. Toast with Jam or Marmalade
Toast your slices and top with your favorite jam, marmalade, or fruit preserves. A sweet and tangy topping paired with the warm, crisp bread is perfect for breakfast or an afternoon snack. You can even add a dollop of cream cheese for an indulgent twist.
4. Dipping Bread for Soups and Sauces
Homemade bread is the perfect companion to any bowl of soup. The crusty exterior and soft interior make it perfect for dipping into creamy soups like tomato basil, potato leek, or butternut squash. It’s also great for dipping into hearty stews or rich sauces.
5. Bread for Bruschetta or Crostini
If you’re in the mood for something a little more festive, turn your loaf into crostini. Slice it thin, toast the pieces in the oven, and top them with fresh tomatoes, garlic, basil, and a drizzle of olive oil for a classic bruschetta. You can also get creative with other toppings like roasted vegetables, cheese, or smoked meats.
6. Homemade Bread for Avocado Toast
Avocado toast is a crowd-pleaser, and your homemade bread is the perfect vehicle for this trendy snack. Toast your bread, spread on a ripe, mashed avocado, and top with salt, pepper, and a squeeze of lemon juice. For added flavor, you can sprinkle on some red pepper flakes, sesame seeds, or fresh herbs.
7. Bread with Olive Oil and Balsamic Vinegar
If you want a simple yet elegant starter, slice your bread and serve it alongside a small bowl of high-quality olive oil and balsamic vinegar. The rich, fruity olive oil and tangy vinegar pair perfectly with the bread for an appetizer that’s quick, easy, and always impressive.
8. French Toast for Breakfast
Transform your bread into a sweet breakfast treat by turning it into French toast. Whisk together eggs, milk, a pinch of cinnamon, and vanilla, then dip your slices of bread and cook them on a hot griddle. Serve with maple syrup, fresh berries, or powdered sugar for a breakfast that feels special.
9. Pairing with Cheese and Charcuterie
Serve slices of your homemade bread on a cheese and charcuterie board. It pairs beautifully with a variety of cheeses like brie, cheddar, or goat cheese, and adds a delightful crunch alongside prosciutto, salami, or olives. It’s an excellent option for parties, picnics, or just a relaxed evening at home.
10. Enjoy with a Salad
If you’re looking for a lighter, balanced meal, serve your homemade bread alongside a fresh, crisp salad. The bread adds a lovely texture to a mix of greens, vegetables, and vinaigrette. You could even make a panzanella salad by tossing cubes of your bread with tomatoes, cucumbers, basil, and a tangy dressing.
Storing Leftover Bread:
Homemade bread is best enjoyed fresh, but if you have leftovers, here’s how to store them:
- Room Temperature: Keep your bread in a breadbox or wrap it tightly in a clean kitchen towel. It should stay fresh for 2-3 days.
- Freezing: If you want to keep it for longer, slice the bread and freeze individual slices in a plastic bag or airtight container. When you’re ready to enjoy, simply toast the slices straight from the freezer.
Conclusion
From simple buttered slices to more creative dishes like bruschetta or avocado toast, your homemade bread is incredibly versatile. With a few toppings or accompaniments, you can take your bread from a humble side to the star of the meal. Enjoy experimenting with these ideas and share them with friends and family for a truly delightful bread experience!
Ready for more bread-making tips? Check out our FAQs below for answers to some common questions!
FAQ
Why isn’t my bread rising properly?
If your bread isn’t rising as it should, the most likely culprit is inactive yeast. Check the expiration date on your yeast—if it’s past its prime, it won’t work as effectively. Also, make sure your water temperature is right! Too hot or too cold can prevent the yeast from activating. Aim for around 110°F (45°C), or warm enough to feel comfortable to the touch.
Can I make this recipe in a traditional oven?
Absolutely! While this recipe is designed for a bread maker, you can easily adapt it for a conventional oven. After your dough has been kneaded and has risen, shape it into a loaf and place it on a greased baking sheet. Preheat your oven to 375°F (190°C) and bake for 25-30 minutes, or until the bread sounds hollow when tapped on the bottom. You’ll still enjoy that homemade, fresh-baked goodness!
Can I use whole wheat flour instead of white flour?
Yes, you can substitute whole wheat flour for part or all of the white flour. If you’re swapping out all the white flour for whole wheat, keep in mind that whole wheat flour absorbs more liquid, so you might need to add a bit more water. If you want a lighter loaf, try replacing just half of the white flour with whole wheat flour for a balanced texture and flavor.
My bread turned out too dense. What went wrong?
A dense loaf can happen for a few reasons. The most common is adding too much flour. Be sure to measure carefully and use a kitchen scale if possible. If your dough is too stiff, add more water, a tablespoon at a time, until it’s smooth and slightly sticky. Overworking the dough can also lead to a dense loaf, so avoid excessive kneading.
Can I add other ingredients to the bread, like seeds or herbs?
Yes! Feel free to customize your loaf by adding herbs, seeds, or nuts. Just fold them into the dough once it’s mixed but before the final rise. Some great options include sunflower seeds, sesame seeds, rosemary, or even shredded cheese. You can get creative with flavors and textures, so don’t be afraid to experiment.
Why is my bread too dry?
If your bread is too dry, you might have added too much flour. When measuring flour, be sure to fluff it up and spoon it into the measuring cup rather than scooping directly from the bag, as this can result in over-measuring. Adding a little extra water or using slightly less flour can help achieve the right moisture balance.
Have You Tried Our Recipe?
There are no reviews yet. Be the first one to write one.